Z-Bee Duo/LAN Coordinator
Prerequisites
- If not yet present, open Z-Bee case and insert the LAN module.
- Power on Z-Bee (i.e. with a cellular charger using a male to female type A usb cable or an USB-C cable, do not power by a PC/Raspberry USB port when used as LAN adapter). Connect an ethernet cable.
- After a while Z-Bee lan will connect to your LAN (its default setting is DHCP); once connected, check Z-Bee IP address in router settings or using apps like Fing. It is recommended to set a static IP for Z-Bee; this can be done in your router settings. Image below show how Z-Bee Lan interface appears in the LAN:

Zigbee2mqtt configuration
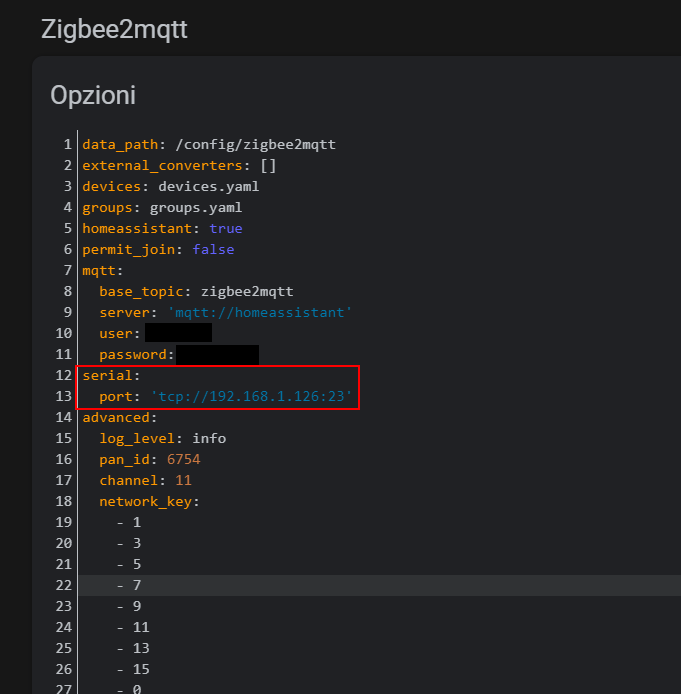
Please follow general zigbee installation instructions here before. Once Z-Bee Duo wifi is connected to wifi network, its ip address have to be set in zigbee2mqtt configuration file as in the picture below:
- Stop zigbee2mqtt.
- Open zigbee2mqtt configuration file and edit serial port as shown.
- Start zigbee2mqtt. NOTE If Z-bee was previously used as USB adapter, the new configuration will maintain all previous settings (no need to repair etc.).

NOTE
If Z-Bee was previously used as USB adapter, the new configuration will maintain all previous settings (no need to repair etc.).
ZHA setup
Please follow general zigbee installation instructions here before. Once Z-Bee Duo Lan is connected to Lan network, during ZHA initial setup its ip address have to be set in ZHA Serial device path as shown:
socket://[IP]:[PORT] for example socket://192.168.1.11:23
NOTE
If Z-Bee Duo was previously used as USB adapter, to migrate to a WiFi or Lan solution follow these steps:
- Delete the whole ZHA integration from Homeassistant settings. Note that the devices already paired wil be mainteined in ZHA configuration !!!
- Add again ZHA integration using ip/port address as shown above this time.
- The new configuration will maintain all previous settings (no need to repair etc.).